
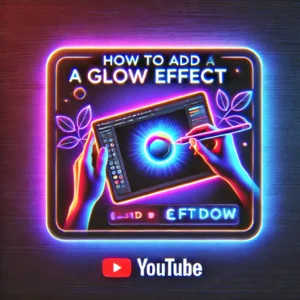
YouTube thumbnails are one of the most important elements in attracting viewers to your content. A captivating thumbnail can significantly increase your click-through rate, helping your video stand out from the competition. One of the best ways to enhance your thumbnail is by adding a glow effect, which draws attention and adds a professional touch to your image. In this article, we will guide you through the steps of adding a glow effect to your YouTube thumbnail, providing detailed instructions and tips to ensure your thumbnail is visually striking and optimized for engagement.
Why Add a Glow Effect to Your YouTube Thumbnail?
A YouTube thumbnail is the first thing viewers see when browsing through content. It plays a significant role in determining whether someone clicks on your video or scrolls past it. The glow effect adds an element of visual appeal, making your thumbnail pop and stand out. By using the glow effect strategically, you can:
- Enhance visibility: The glow effect makes key elements in your thumbnail stand out, increasing their visibility even on smaller screens.
- Create emphasis: Adding a subtle glow around text or important visual elements can direct viewers’ attention exactly where you want it.
- Increase professionalism: A glow effect can give your thumbnail a polished, professional look that reflects the quality of your content.
With these benefits in mind, let’s dive into the process of creating a thumbnail with a glow effect.
Step-by-Step Guide: How to Add a Glow Effect to Your YouTube Thumbnail
1. Choose the Right Software for Editing
Before you begin adding the glow effect to your YouTube thumbnail, you need the right tools. Several photo editing software options are available, both free and paid, that allow you to create and customize thumbnails. Some of the most popular tools include:
- Adobe Photoshop: One of the most powerful image editing tools, offering advanced features for creating custom glow effects.
- Canva: A user-friendly design tool, perfect for beginners who want to create professional thumbnails with minimal effort.
- GIMP: A free, open-source alternative to Photoshop with a variety of customizable effects.
- PicMonkey: Another easy-to-use platform for creating YouTube thumbnails with built-in filters and glow effects.
Once you’ve selected your editing tool, open your thumbnail image and get ready to add that stunning glow effect.
2. Select the Area to Apply the Glow Effect
The next step is to decide where you want the glow effect to appear on your thumbnail. Common areas that benefit from a glow effect include:
- Text: Titles or other text elements can greatly benefit from a glowing outline, making them more readable and eye-catching.
- Key visual elements: Faces, logos, or important items in the image can be highlighted with a glow to draw attention to them.
- Background highlights: A subtle glow behind the main subject can help create depth and a sense of focus.
Once you’ve identified the areas to apply the glow effect, proceed to the next step.
3. Applying the Glow Effect in Adobe Photoshop
If you’re using Adobe Photoshop, follow these steps to add a glowing effect:
- Step 1: Open your YouTube thumbnail image in Photoshop.
- Step 2: Select the layer or object that you want to apply the glow effect to.
- Step 3: Go to the “Layer” menu and choose “Layer Style” > “Outer Glow.”
- Step 4: In the Outer Glow settings, adjust the following options:
- Blend Mode: Set this to “Normal” or “Screen” for a bright, smooth glow.
- Opacity: Increase the opacity to control the intensity of the glow.
- Size: Adjust the size to make the glow appear subtle or more pronounced, depending on the effect you desire.
- Spread: Use this option to control the expansion of the glow.
- Color: Choose a color that complements your thumbnail design. You can use a bright color like yellow, blue, or pink for contrast or go with a white glow for a softer effect.
- Step 5: After adjusting the settings to your liking, click “OK” to apply the glow effect.
4. Applying the Glow Effect in Canva
For users who prefer a simpler tool like Canva, here’s how you can add a glow effect:
- Step 1: Open your YouTube thumbnail in Canva.
- Step 2: Select the text or image you want to apply the glow effect to.
- Step 3: Click on the “Effects” tab located at the top of the screen.
- Step 4: Choose the “Glow” option from the available effects.
- Step 5: Adjust the intensity and color of the glow to suit your design.
- Step 6: If necessary, you can fine-tune the glow effect by adjusting the brightness, contrast, or transparency.
5. Fine-Tuning the Glow Effect
Once the glow effect is applied, it’s essential to fine-tune the design to ensure it looks polished. Consider the following adjustments:
- Opacity: Too much opacity can make the glow appear harsh, while too little can make it subtle. Strike the right balance to maintain visibility without overwhelming the design.
- Size and Spread: Test different sizes to see what works best for your thumbnail. A larger glow can create a more dramatic effect, while a smaller one may look more natural.
- Contrast: Adjust the contrast between the glow and the surrounding elements to create a clear separation and avoid visual clutter.
6. Previewing and Saving Your Thumbnail
After making the necessary adjustments, preview your thumbnail to see how the glow effect looks on both desktop and mobile devices. YouTube thumbnails are often viewed on smaller screens, so make sure the glow effect is visible and enhances your design without overwhelming the image.
Once you’re satisfied with the result, save the image in a high-quality format, such as PNG or JPG. Ensure that the file size is optimized for fast loading times without sacrificing image quality.
Tips for Optimizing Your YouTube Thumbnail with Glow Effects
1. Keep It Simple
While the glow effect can add a striking visual element to your thumbnail, it’s essential not to overdo it. Too many glowing elements can create a cluttered, overwhelming design. Focus on a few key areas and keep the rest of the thumbnail clean and simple.
2. Use Contrast Wisely
Glow effects work best when there is enough contrast between the glowing element and the background. Ensure that the glow stands out against the surrounding colors, but avoid using overly bright or clashing colors that might make the image hard to read or distracting.
3. Consistent Branding
If you regularly create YouTube videos, make sure your glow effect aligns with your overall branding. Consistency in design helps your audience recognize your content easily and reinforces your brand identity.
4. Test Different Variations
Experiment with different glow colors, sizes, and placements to see what resonates best with your audience. You can A/B test multiple thumbnails to find the one that generates the highest click-through rate.
5. Keep Mobile Viewing in Mind
Most YouTube users watch videos on their mobile devices, where thumbnails are smaller. Make sure your glow effect is subtle enough to look good on all screen sizes, but bold enough to grab attention.
Conclusion
Adding a glow effect to your YouTube thumbnail is a simple yet effective way to enhance your content and attract more viewers. By following the steps outlined in this guide, you can create visually appealing thumbnails that stand out in search results and encourage more clicks. Whether you use Photoshop, Canva, or another editing tool, the glow effect will add that extra touch of professionalism and make your videos more engaging.